Intro
Postman is a development tool you can use to test the calling of an API. We will demonstrate how to configure Postman with the MailboxValidator Email Validation API Swagger configuration to easily setup the request to the API.
Pre-requisites
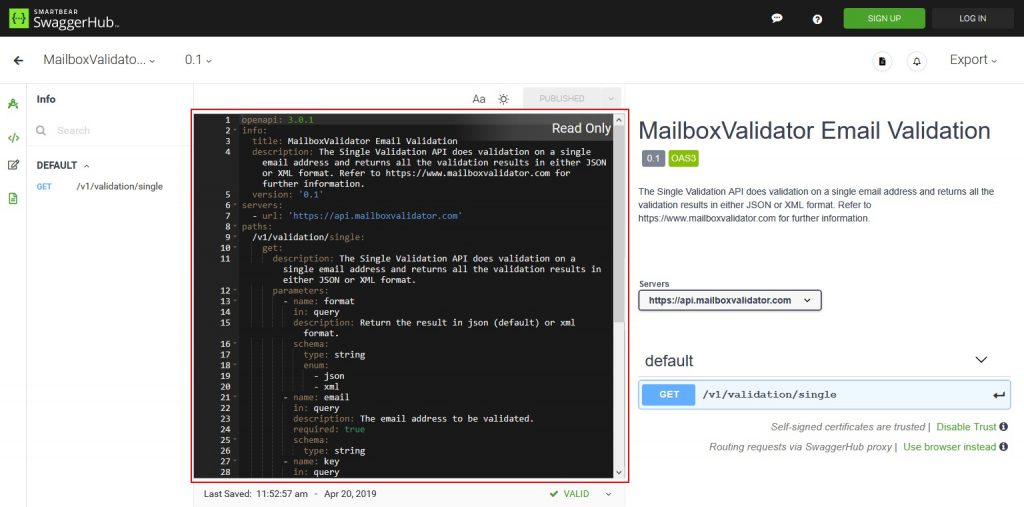
First of all, you will need to download the Postman software and install it. Next, you’ll need to go to the MailboxValidator Email Validation API Swagger page at https://app.swaggerhub.com/apis/mailboxvalidator/MailboxValidator-Email-Validation/0.1 where you need to copy out the whole YAML configuration text. The YAML text is the part inside the red box below.
Configuring Postman with the YAML text
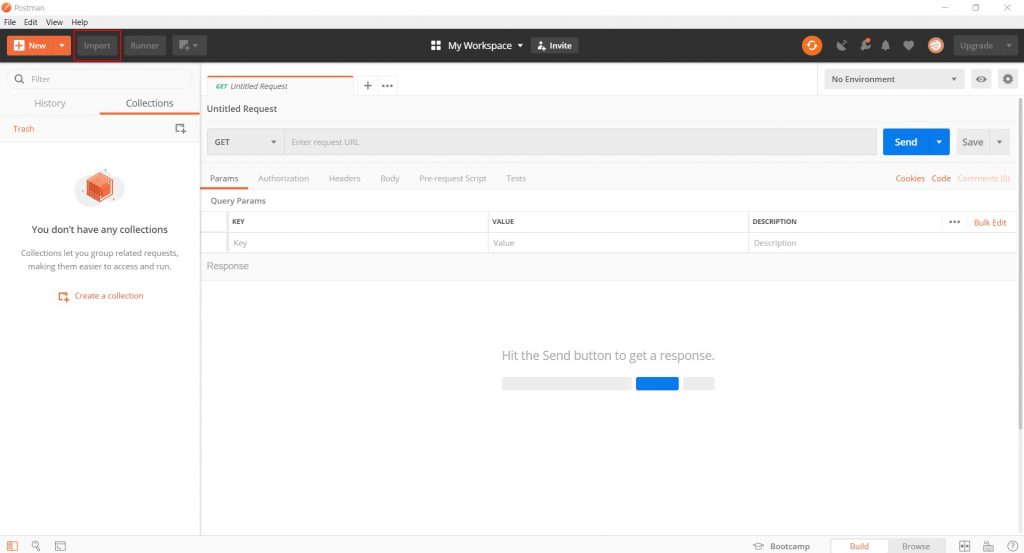
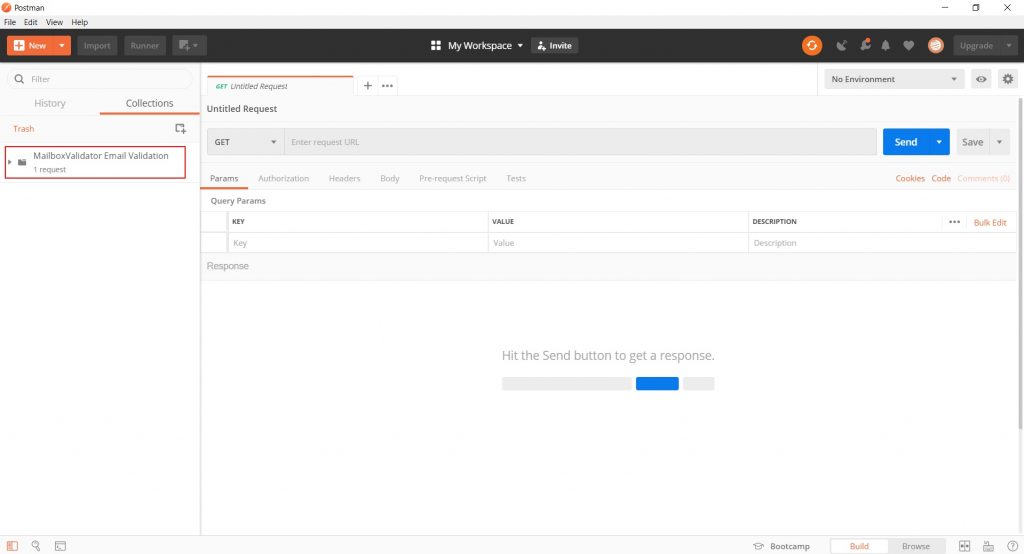
Run the Postman software and you should see the below. If you get shown the Create New dialog, you can just close it.
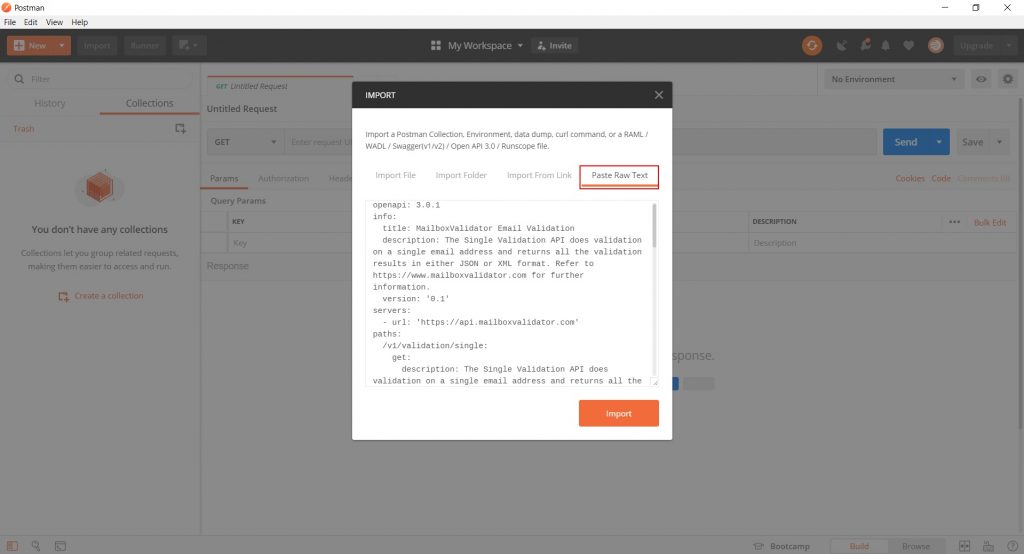
Click on the Import button at the top left and you should see the below. Click on Paste Raw Text in the Import dialog. Next, paste the YAML text from above then click on Import.
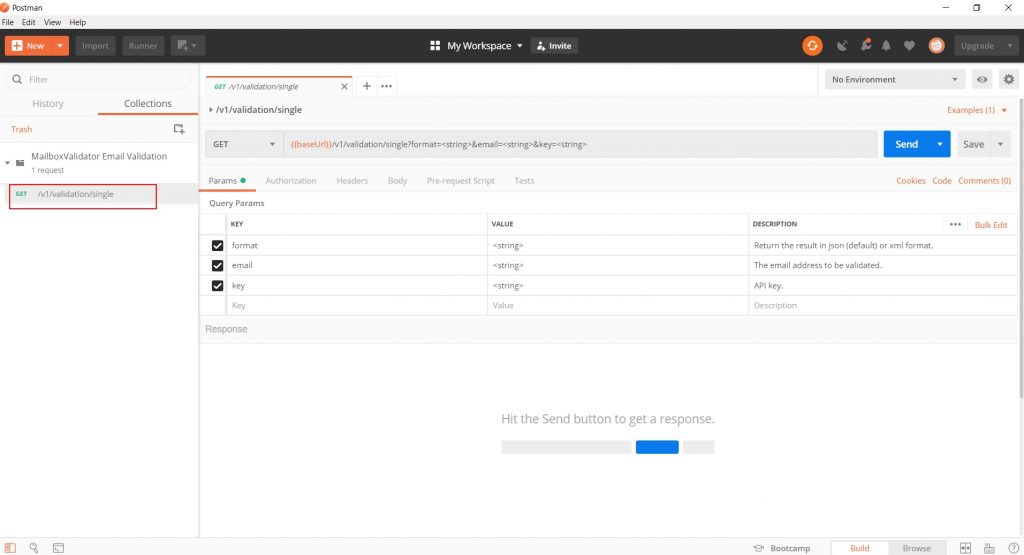
You should now see the following. Click on the part inside the red box. That will expand the collection to show you all available APIs.
First test of calling the API
Click on the API which is the Email Validation API. You will then see the parameters required to perform a GET request to this API.
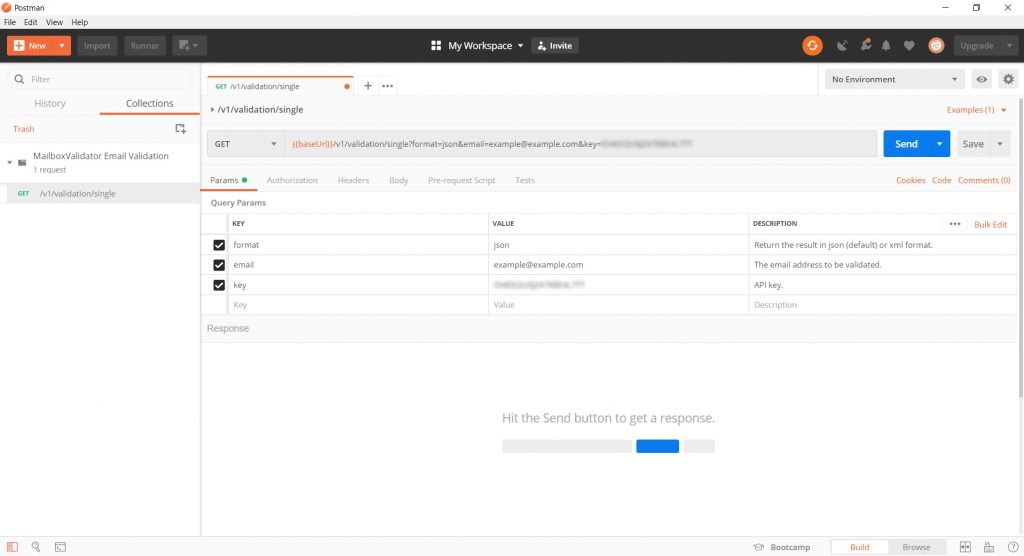
You can just replace the values in the VALUE column of the Params section with actual values that you wish to pass to the API. Let’s test this API with the following values:
| Parameter name | Parameter value |
| format | json |
| example@example.com | |
| key | Your MailboxValidator API key |
If you don’t have an API key, you can sign up for a free API key at https://www.mailboxvalidator.com/plans#api and you can input it like below.
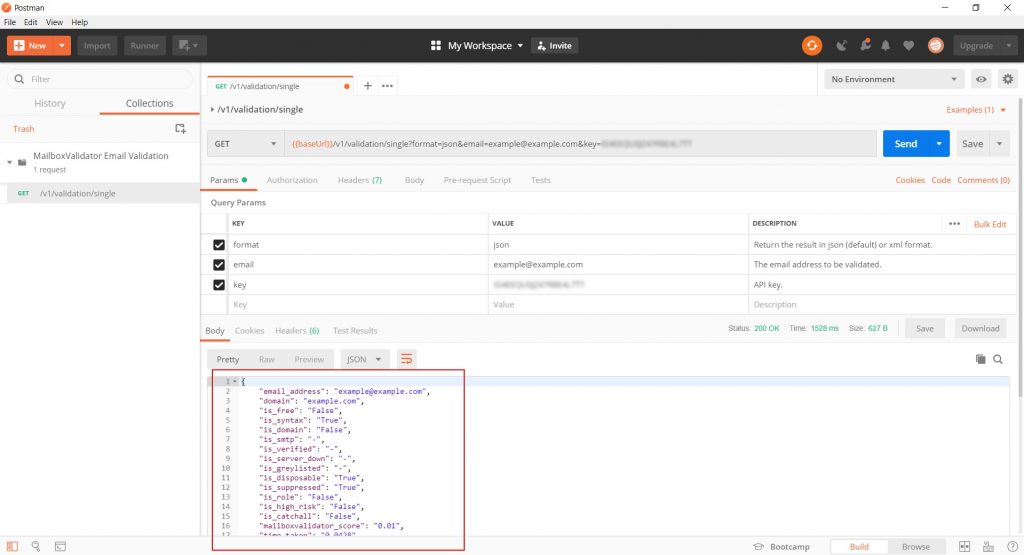
Upon pressing the Send button, you will receive the json result as below.
Calling the API using a bulk input file
The previous section dealt with calling the API with a manually keyed in set of inputs. What if you have a file full of inputs you want to pass to the API? We will now show how to read inputs from a file to pass to the API.
For our example, we have a file called mailboxvalidatortest.csv which looks like below. The CSV data file should have a header.
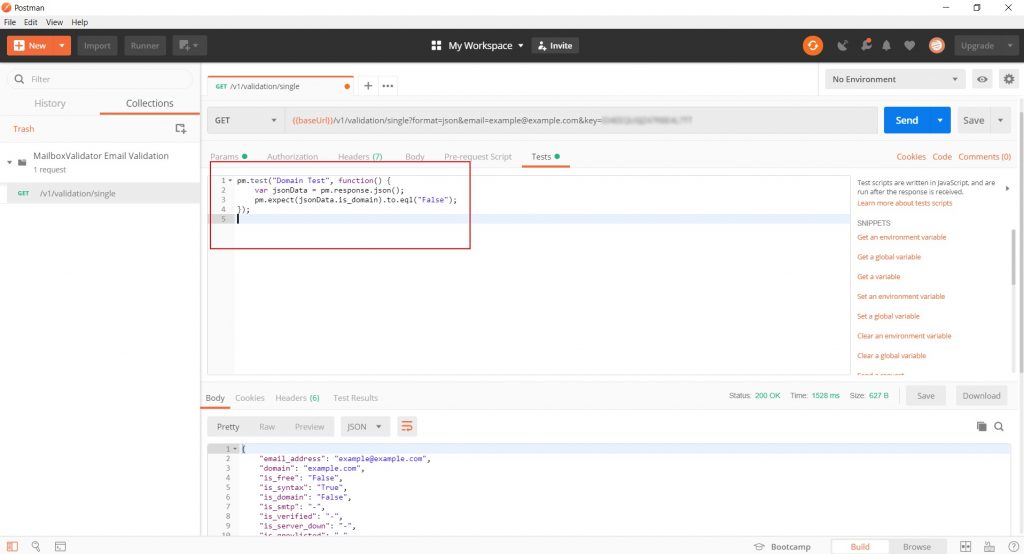
Before we run the bulk input file through the API, we need to create some tests to validate the results being returned from the API. Click on the Tests section and paste the following codes. The codes will test the return values of the 3 rows of input we have in our test file.
pm.test(“Domain Test”, function() {
var jsonData = pm.response.json();
pm.expect(jsonData.is_domain).to.eql(“False”);
});
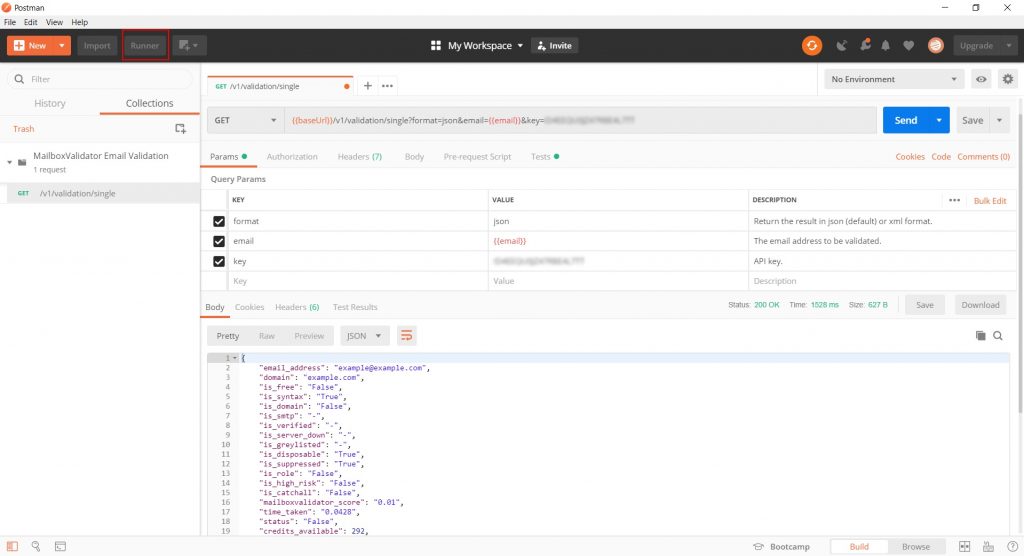
To have the API work with dynamic values from the test file, we have to modify the following parameters to become variables. The variable names must follow the header names in the CSV file. The fields that we manually supplied values should now be using variables with the header names, i.e. {{email}}. This means the dynamic values for these fields will come from their named counterpart in the CSV file. The curly braces are required to denote that these values are variables.
Now we are ready to call the API using input from the bulk input file. Inside Postman, click on the Runner button at the top left of the program. The button is enclosed in the red box inside the above image.
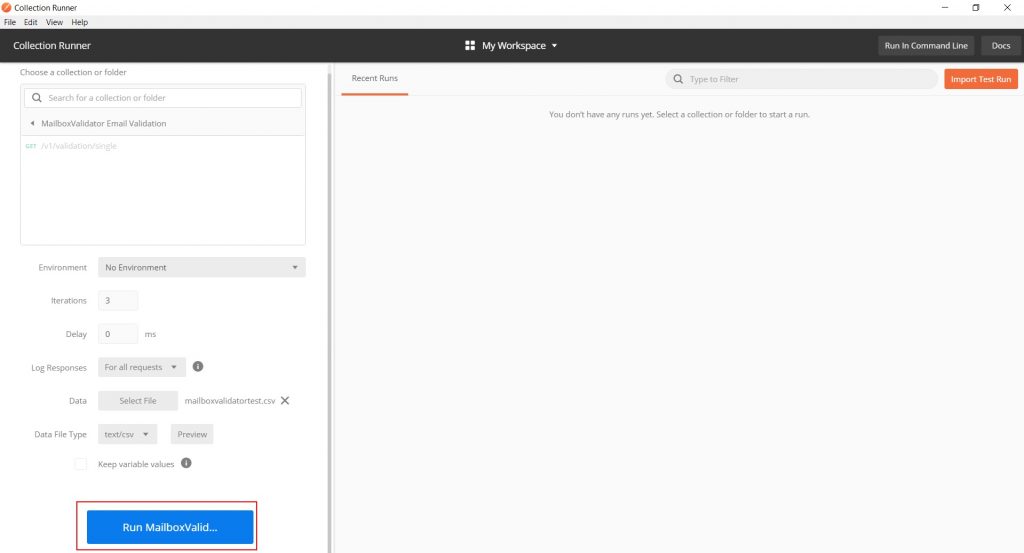
The Collection Runner window should now be shown. Click on the MailboxValidator Email Validation collection. Next, click Select File to select the mailboxvalidatortest.csv file from above. Then click on the blue Run button.
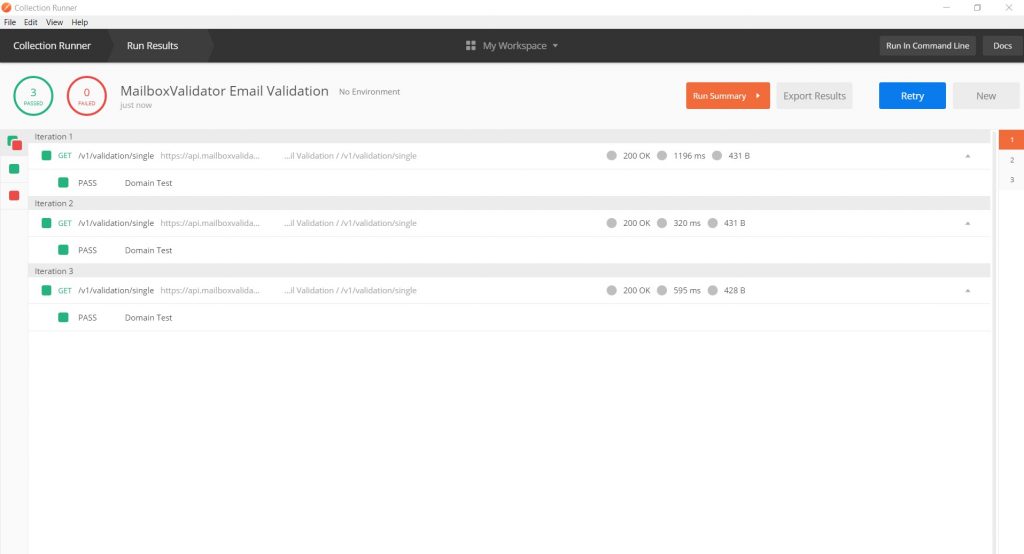
The test results are done and looks like all 3 input lines have passed the validation test.
Get started with MailboxValidator
Improve your email deliverability and sender reputation in email marketing.
Register today and clean your email lists for FREE!

