Introduction
Pipedream is a minimal code integration platform for developers that allows users to connect to APIs remarkably fast. User are able to connect to any API and schedule their tasks. They can also easily integrate their data to other services. For example, user can import their list in Google Sheets to any ESP in Pipedream.
MailboxValidator is now available in Pipedream for integration. That means Pipedream user can easily validate email addresses by using the MailboxValidator API service. This article will show how to use the MailboxValidator API service in Pipedream. It will use Google Sheet as the source. Users can follow this step-by-step guide while using Pipedream.
Note: A MailboxValidator API key is required before using the service. If you do not have one, you can sign up for a free API key at https://www.mailboxvalidator.com/plans#api.
Steps to use the MailboxValidator API with Google Sheets in Pipedream
- First, login to your Pipedream account.
- Go to “Workflows”, and click on the “New +” button to create a new workflow.

- In the “Add a trigger” box, look for the “Google Sheets” option. Click on the option, and choose “New Row Added (Instant)” option. We will going to obtain a new email from the new row added.


- Choose an Google account from the dropdown menu. If you haven’t connected to the Google account before, click on the “Connect Google Sheets” to connect a Google account. Follow the steps in the pop-out screen to connect your account.
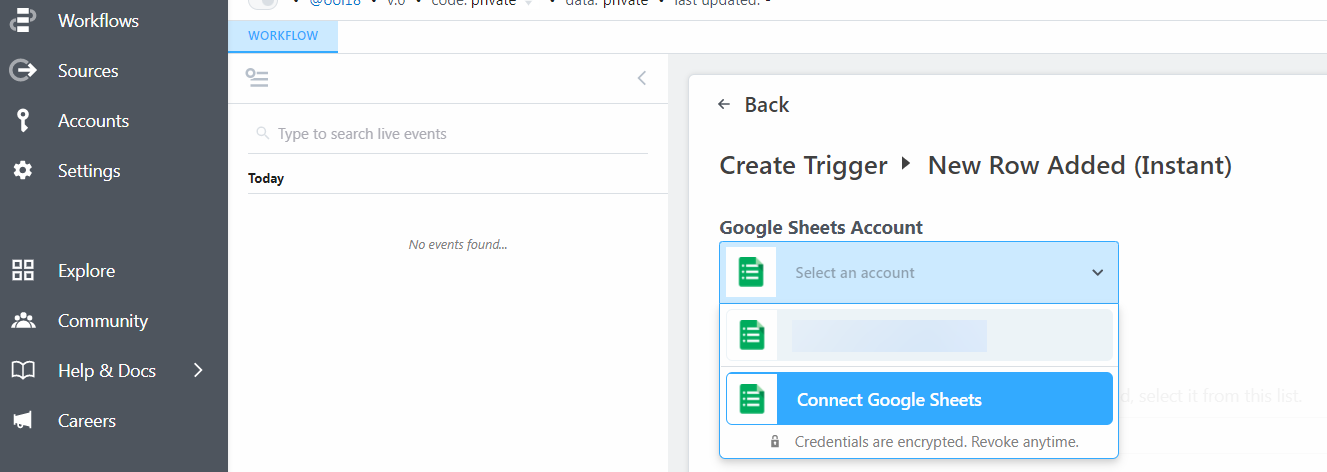
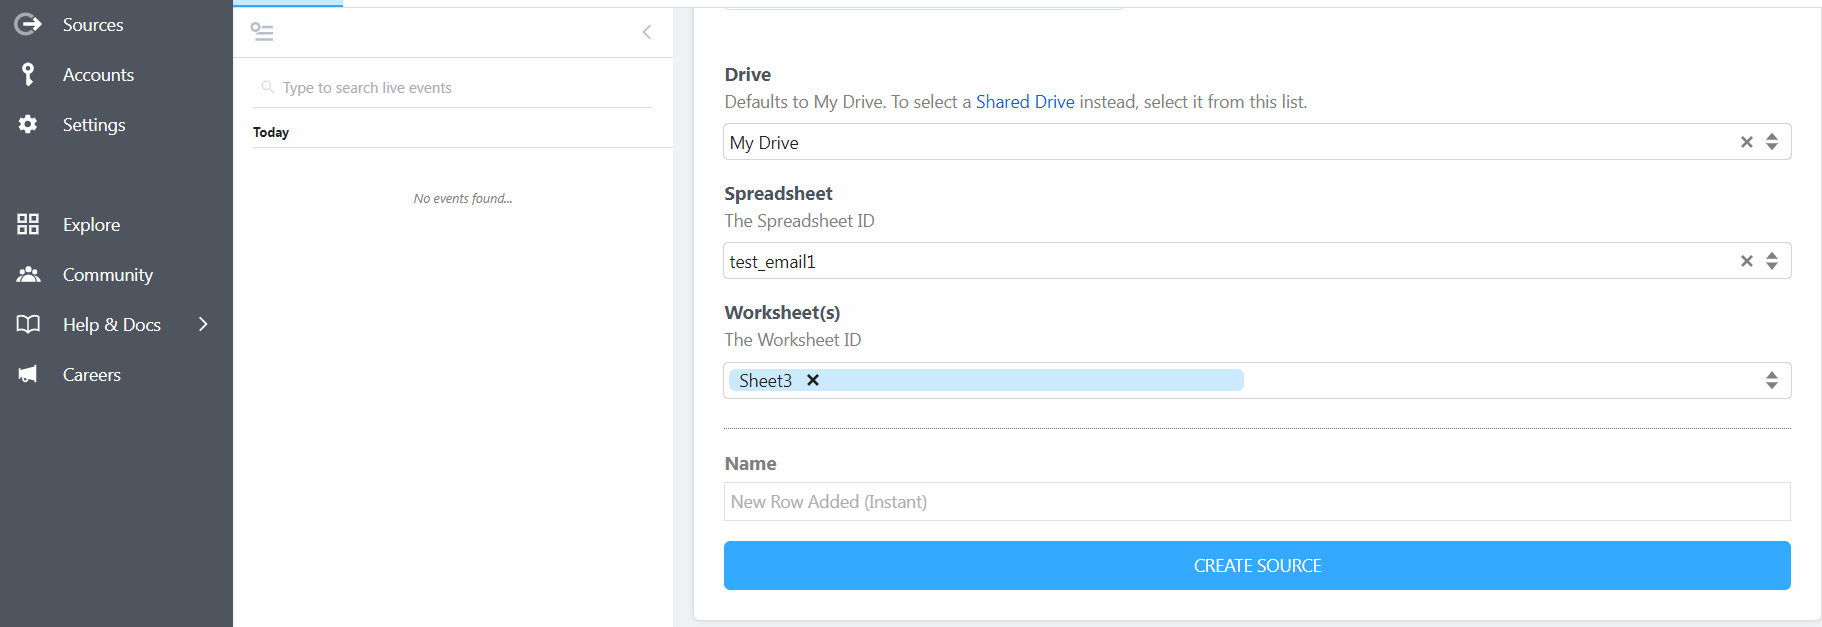
- Select your destination drive, and select the spreadsheet ID and worksheet ID from the dropdown menus. Click the “Create Source” button when you have done.
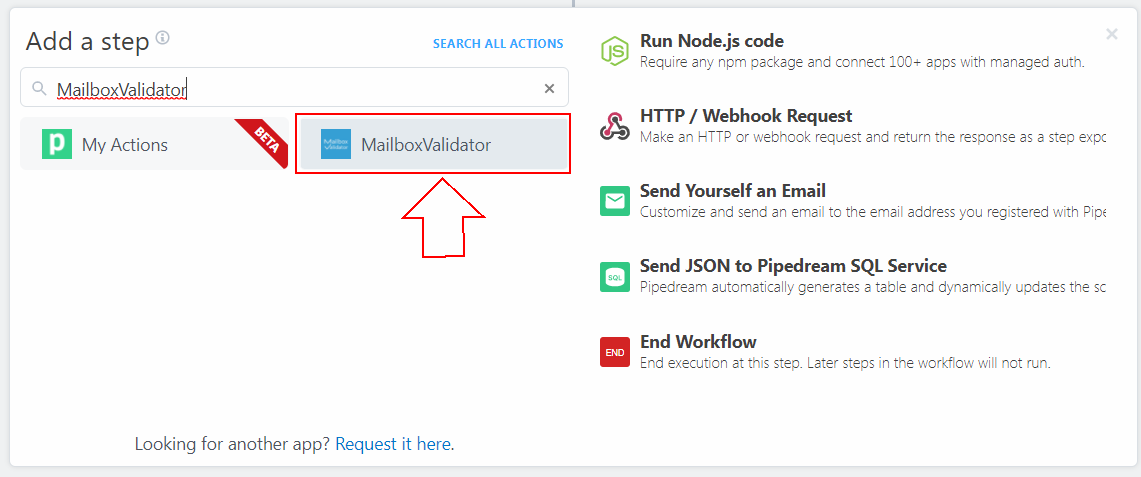
- In the same page, click the “+” button to add another step. Search “MailboxValidator” from the search box and click the “MailboxValidator” option. After that, click the “Use any MailboxValidator API” option.

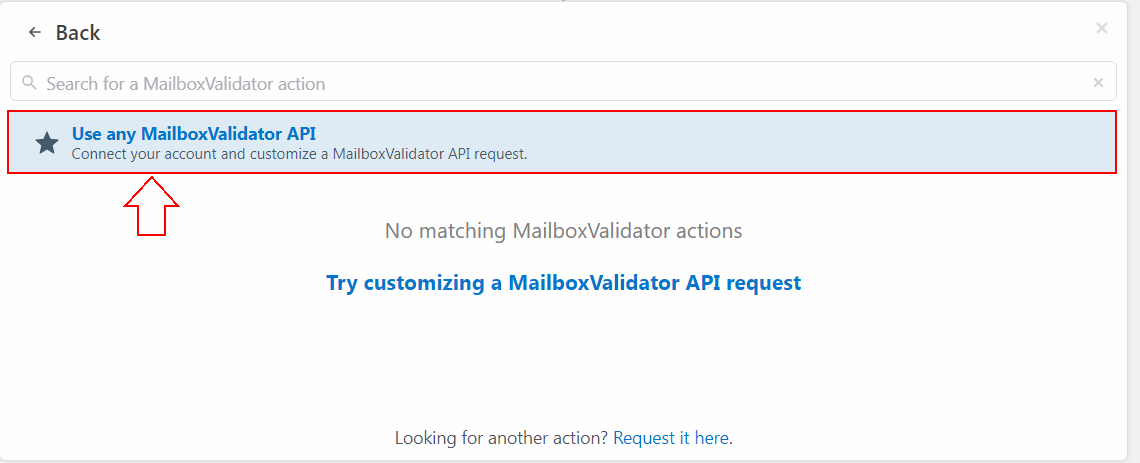
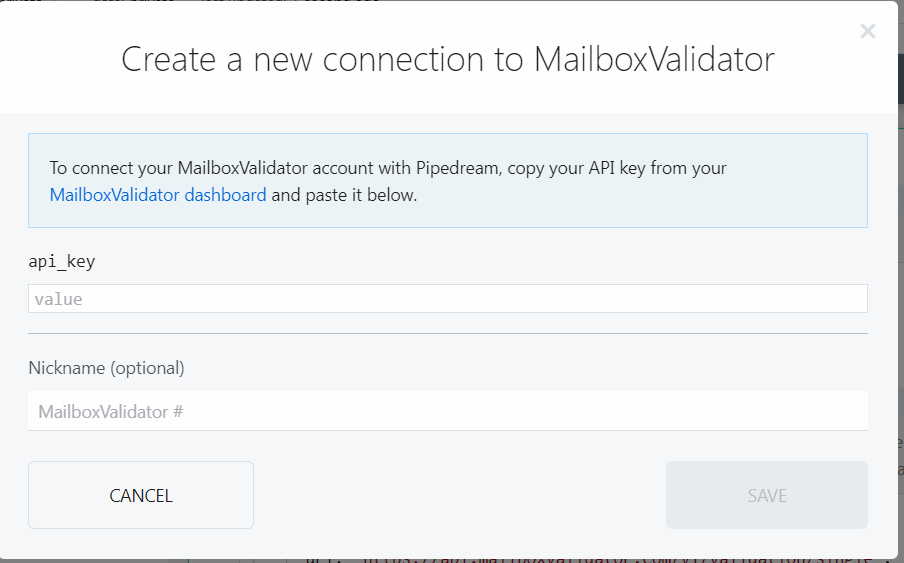
- Click the “Connect MailboxValidator” option. In the pop-up dialog box, enter the API key you obtained from the MailboxValidator dashboard. Click “SAVE” button to keep the setting.
- In the editor box, you will see NodeJS code. Go to the line “email: `{enter_email_to_validate_here}`,”, and change to “email: `${steps.trigger.event.newRow[0]}`,”.
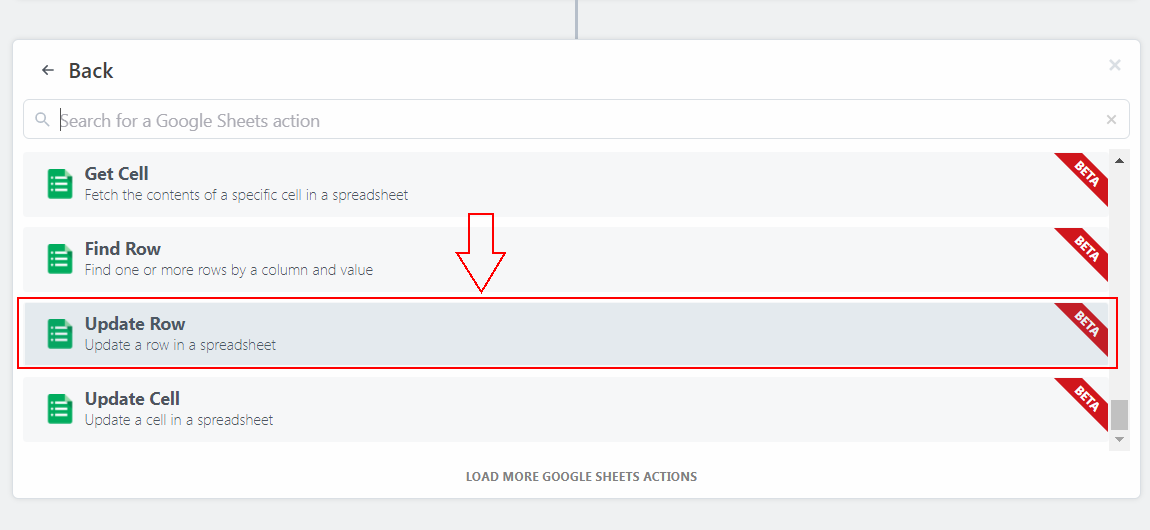
- If you want to keep the validation status back to the sheet, click the “+” button to add another step. Click on the “Google Sheets” option, scroll down until you found the “Update Row” option, and click on it.
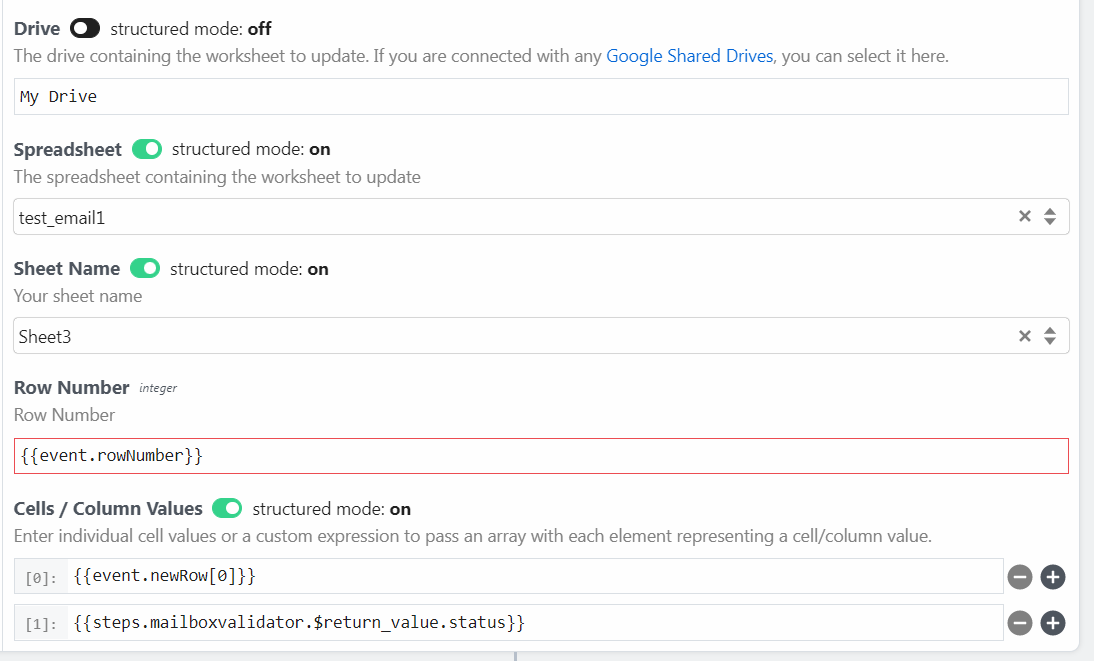
- Choose back the same Google account, the destination drive, the spreadsheet ID and worksheet ID from the dropdown menus. In the “Row Number” option, enter this “{{event.rowNumber}}” into the textbox. In the “Cells / Column Values” option, enter “{{event.newRow[0]}}” in the first text box. Then, click on the plus sign beside the first text box. After that, enter “{{steps.mailboxvalidator.$return_value.status}}” in the second text box.
- After you have done all settings, remember to click the save button to save the settings and deploy button to deploy the workflow in real time.

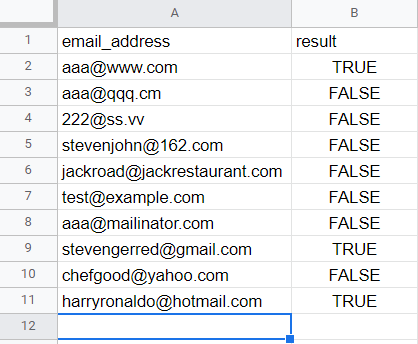
- You can now check your spreadsheet to see the result.
Conclusion
Pipedream has various applications that you can integrate with the MailboxValidator API service. You can reduce the hassle of manually uploading the list, as they provided the scheduling feature.
